People seem to think my presentations look nice. They sure don't start out that way. The ugly phase is critical to getting it nice.
Here's how I made my presentation for Marketo's 2015 Marketing Nation Summit.
Step one: say it aloud. I pitched my session in a hundred words back in November. In early March, after thinking about my session for a while, I recorded myself explaining what I'd say to some Marketo staffers on the phone. The five minute recording helped me advance from thoughts to structure.
Step two: put it on the board, yes! I listened to the audio a few times and noted the key points on sticky notes. Arranging the notes on the wall turned into a rough outline for the talk. I filled in the empty spaces with additional notes to connect the story.

|
| The wall next to my workspace |
Step 3: rough draft. After telling the story and plotting an outline, I'm finally ready to make a rough draft. I typed bullet points of what I'd actually say to each slide from the wall.

|
| Plain text printouts |
I think it's important to note that while this step is the first real computer-aided step, I hadn't yet started any on-screen editing. After printing my rough draft out, I didn't save the file. I did use a pen and highlighter: drawing out the key themes and sketching potential visuals to show those themes.
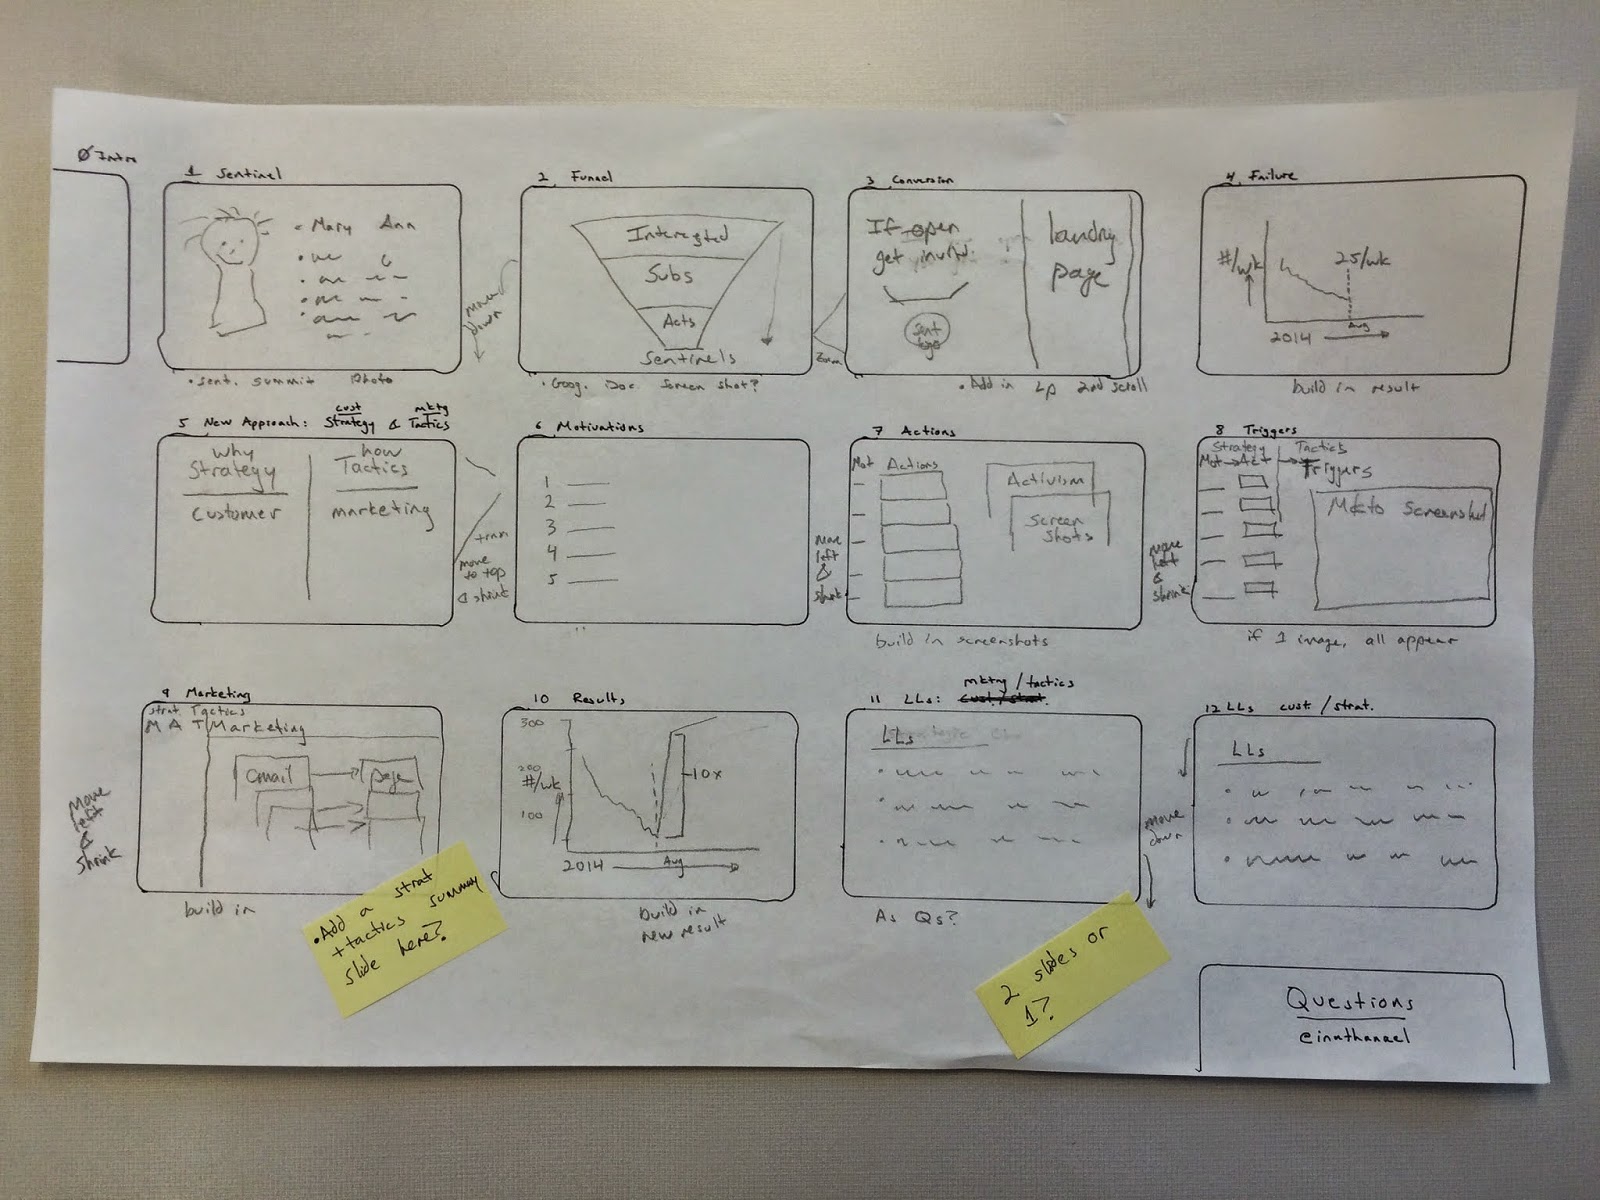
Step 4: draw some slides. With top themes in hand and some visuals, I grabbed an enormous piece of paper and drew the slides. Notice: pen for outlines and titles, pencil for drawing. I wanted to make sure I edited ideas into their best form.

|
| Each slide is the size of a business card |
Step 5: opening Powerpoint. (Or Keynote, in my case.) Once I knew what I wanted to make, the software became not a drawing board, but a finishing board. And I think it's way better at that: if I used the templates and defaults as a starting point, my deck would look like everyone else's, but if I use the software to create what I want (visuals that illustrate my key themes), the deck will be memorable.
This step took a while—equivalent to the time of the previous four combined. Instead of being satisfied with whatever worked, I took a lot of time to get the visuals right. It may have been faster had I opened a Powerpoint file first and started drafting the talk. Getting it done right is what honors the audience.
Lessons learned:
- Record yourself talking about an idea to jumpstart your drafting process.
- Sticky notes on a wall let you easily try a few different orderings of slides.
- Allow a lot of time for slide-making, but don't start with a blank Powerpoint.
And last, but not least, here's the final product: